
Making your own sourdough starter sounds complicated. It really is not. All you need is flour, water, and about 10 minutes a day. Learning how to make sourdough starter from scratch gives you something most store-bought bread can never offer. a living culture that makes your bread rise naturally and taste better every single time.
What Is a Sourdough Starter and Why Does It Matter
A sourdough starter is a live mixture of wild yeast and good bacteria. It forms when flour and water sit together and begin to ferment. The wild yeast lives in the flour itself and in the air around your kitchen. Once it gets going it produces carbon dioxide which makes your bread rise. No commercial yeast needed.
What makes it special is that your starter is completely unique to you. The yeast and bacteria in your jar come from your flour, your hands, and your kitchen environment. Someone baking in Texas will grow a different culture than someone baking in Seattle. That is where a lot of that tangy complex flavor comes from.
Before instant yeast became common bakers did this for thousands of years. Starters were passed through families and carried across countries. You are essentially doing the same thing they did, just in your kitchen today.
What You Need Before You Start
You do not need much at all. Here is what to gather before day one.
A clean glass jar. Something that holds at least 3/4 of a liter works well. You want to see the bubbles forming through the glass.
A kitchen scale. Measuring by weight is far more accurate than using cups. The difference between 50g and 60g of flour actually matters here.
Flour. Whole wheat or rye flour works best on day one because it has more natural yeast already in it. After that you can switch to unbleached all purpose or bread flour for regular feedings.
Water. Room temperature water is fine. More on tap water in the FAQ section below.
A rubber spatula or spoon for mixing.
That is genuinely it. No fancy tools required.
How to Make Sourdough Starter: Day by Day Guide
This process takes 7 days minimum. Some kitchens need 10 to 14 days depending on temperature and flour type. Do not rush it. The patience part is the hardest but also the most important.
Day 1: The First Mix
Measure 50g of whole wheat flour and 50g of room temperature water into your clean jar. Stir it well until no dry flour remains. The texture should look like thick pancake batter.
Cover the jar loosely. A cloth held with a rubber band works fine. You do not want it airtight because the culture needs to breathe.
Leave it at room temperature for 24 hours. Do not touch it.
Day 2: First Check
Look inside your jar. You might see a few small bubbles or nothing at all. Both are normal. The smell might be a little sour or slightly off. That is completely fine at this stage.
Discard about half of what is in the jar. This keeps the population of bacteria manageable. Add 50g of unbleached all purpose flour and 50g of water. Stir well and cover again.
The discard does not have to go in the trash. You can mix it into pancake batter, waffles, or flatbread. It adds a mild sour flavor that most people love.
Days 3 and 4: Building Activity
By now you should start seeing more bubbles. The smell will shift to something tangier. That sourness is a good sign. it means the right bacteria are taking hold.
Continue discarding half and feeding with 50g flour plus 50g water every 24 hours. Keep it in the same spot in your kitchen. Consistent temperature helps a lot.
If your kitchen runs cold put the jar in your oven with just the oven light on and the door cracked slightly. That small amount of warmth is enough to keep fermentation moving.
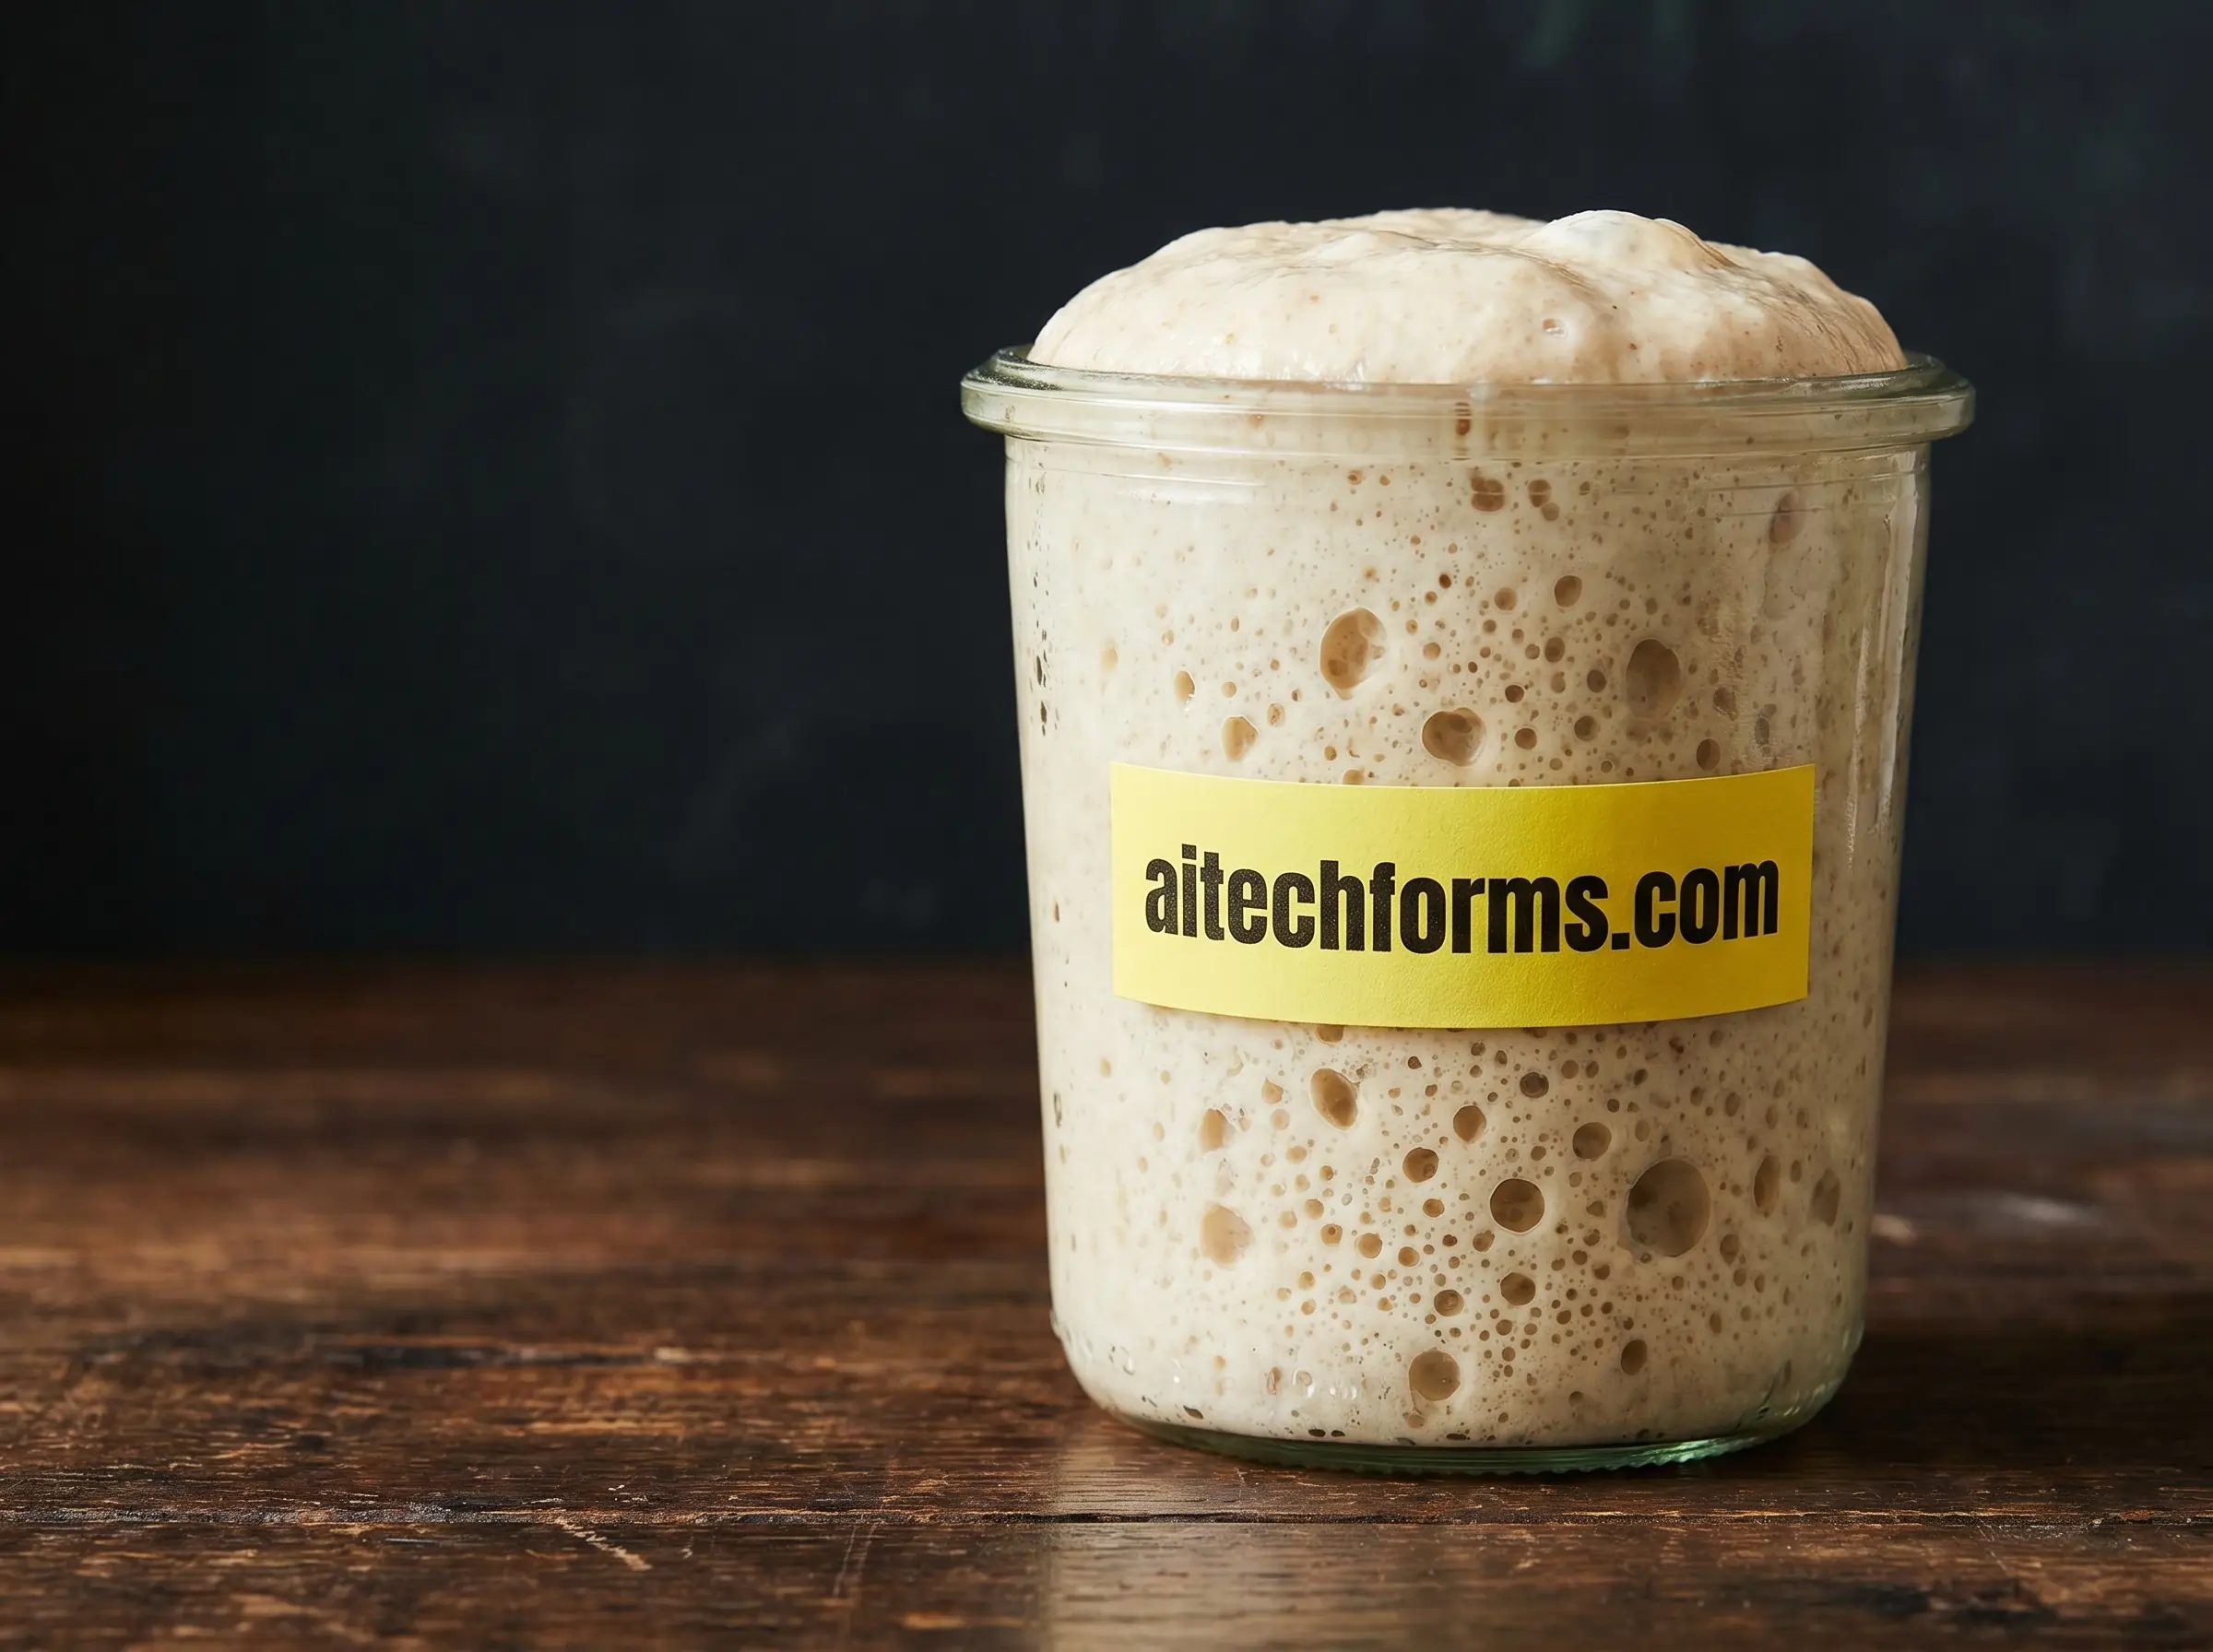
Days 5 and 6: Things Get Interesting
This is where it starts to feel real. Your starter should be rising noticeably after feedings. It will peak somewhere between 4 to 8 hours after you feed it then slowly fall back down. That rise and fall pattern tells you the yeast is active and healthy.
Switch to feeding twice a day now. Once in the morning and once in the evening. Each time discard half and add 50g flour plus 50g water.
You can do the float test to check activity. Drop a small spoonful of starter into a glass of water. If it floats the yeast is producing enough gas and your starter is likely ready. If it sinks give it another day or two.
Day 7 and Beyond: Ready to Bake
Your how to make sourdough starter journey reaches its first finish line when the culture doubles in size within 4 to 6 hours of a feeding and holds plenty of bubbles both on the surface and throughout.
At this point your starter is ready to use in bread recipes. The smell should be pleasantly tangy and slightly fruity. Not harsh or chemical.
If your starter is not there yet by day 7 just keep going. Some environments take longer. Two weeks is completely normal and not a sign of failure.
How to Feed and Maintain Your Starter Long Term
Once your starter is active you need to keep it alive. Think of it like a houseplant that needs regular watering.
If You Bake Often
Keep your starter at room temperature and feed it every 24 hours. A simple ratio is 20g of starter kept in the jar plus 40g of water and 40g of flour. Stir well after each feeding. This 1:2:2 ratio keeps your culture healthy and ready.
If You Bake Once a Week or Less
Store your starter in the fridge. Cold temperatures slow the fermentation way down so it only needs feeding once a week. Pull it out, discard down to about 20g, feed with fresh flour and water, let it sit at room temperature for a few hours until it shows some activity, then put it back in the fridge.
Before you bake with a refrigerated starter give it one or two feedings at room temperature to wake it back up fully.
Signs Your Starter Is Healthy
Knowing what to look for saves a lot of guessing. A healthy starter will show these things.
It rises predictably after each feeding. The timing might be 4 hours or 8 hours depending on your kitchen but it should be consistent.
It smells tangy and mildly yeasty. A slightly cheesy or vinegary smell is fine. A smell like nail polish remover means it needs feeding more often.
Bubbles are visible throughout the culture not just on the surface. Small bubbles trapped inside the mixture mean fermentation is active.
It doubles in size at its peak before slowly falling. You can mark the jar with a rubber band to track the rise easily.
Common Problems and What to Do About Them
A Pink or Orange Streak Appeared
Throw it out and start over. This color means harmful bacteria got in. Wash your jar thoroughly before beginning again.
Liquid on Top
This gray or dark liquid is called hooch. It is just alcohol produced by hungry yeast. It smells sharp and unpleasant. Pour it off and feed your starter. It means you are waiting too long between feedings.
No Bubbles After 5 Days
Check your flour. Bleached flour is a common problem because the bleaching process kills the wild yeast. Switch to unbleached all purpose or whole wheat and continue. Also check your kitchen temperature. Below 65 degrees Fahrenheit fermentation slows dramatically.
It Smells Really Bad
A strong cheese or rotten smell in the first 3 days is normal. After day 4 the smell should shift toward something more pleasant. If it still smells awful by day 6 check your water source and flour freshness.
FAQ’s
Is sourdough bread ok for diabetics?
Sourdough bread tends to have a lower glycemic index than regular white bread because the long fermentation process breaks down some of the starches. This means blood sugar rises more slowly after eating it. That said every person responds differently and diabetics should still monitor portions and consult their doctor before making sourdough a regular part of their diet.
What ingredients are in sourdough starter?
A sourdough starter contains only two ingredients. flour and water. That is it. The wild yeast and bacteria that make it come alive are already naturally present in the flour and your surrounding environment. No commercial yeast, no sugar, no additives of any kind are needed or recommended.
Is sourdough good for IBS?
Many people with IBS find sourdough easier to digest than regular bread. The long fermentation breaks down certain compounds called FODMAPs which are often the trigger behind IBS symptoms. Research is still ongoing but anecdotal evidence is strong. It is always worth testing a small amount and seeing how your body responds before eating it regularly.
What is the best flour for sourdough starter?
Whole wheat or rye flour works best for the first day because both contain higher amounts of natural wild yeast. After that unbleached all purpose flour or bread flour keeps things simple and consistent. King Arthur is a popular and reliable brand among home bakers. The key word is unbleached. Bleached flour can slow or even prevent fermentation.
Can I use tap water for my starter?
You can use tap water in most cases but it depends on your local water supply. Heavily chlorinated tap water can slow down or disrupt fermentation because chlorine is designed to kill microorganisms. If your starter seems sluggish and nothing else explains it try switching to filtered water or let tap water sit uncovered for an hour before using it. The chlorine dissipates naturally when left out in the open.
Conclusion
Making a sourdough starter is one of those skills that feels magical the first time it works. You mix two simple ingredients, pay a little attention each day, and within a week you have something alive that can leaven bread without any help from a grocery store packet.
The most important things to remember are to use unbleached flour, keep feeding it consistently, and do not panic if progress feels slow. Every kitchen is different and the wild yeast will find its rhythm.
Your next step is to pick up a bag of whole wheat flour, grab a clean jar, and start on day one today. Once your starter is active and bubbly you will be ready to bake your first real loaf.
If you want more beginner baking guides, tips on sourdough troubleshooting, and practical kitchen advice, visit aitechforms.com where we keep things simple and useful for home bakers at every level.